By Sari Skinnider
We are all born with accurate, flexible spines. The curvatures provide an ideal foundation upon which to build an entire infrastructure of strength and flexibility, as well as mental health! But as we age, lifestyle and other decisions can degrade this infrastructure. And then our mental function changes with our posture – with a healthy spine our mind is more attentive; when we slouch our mind is dull.
So when I design an asana program for my students, my focus is on maintaining the strength and flexibility of the spine, by maintaining its natural curvatures. This blog will educate you about the architecture of the spine, and how to maintain its strength and flexibility.
Goals of Asana Program:
- Slow down changes in curvatures caused by aging
- Become more flexible and stronger in the spine
- Improvement in mental state
The curvatures of the spine
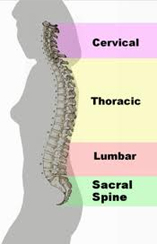 The curvatures of the spine are a big part of its strength. To maintain the strength and flexibility of your spine, you must maintain its natural curvatures. The spine has four curvatures, three of which change with body movement and breathing: Cervical, Thoracic, and Lumbar. The Sacral (or Pelvic) curvature is fixed because the vertebrae are fused together.
The goal of an asana program is to maintain the natural curvatures without increase or decrease. The spine isn’t exactly straight -adjacent curvatures are opposite in the direction of the curve to allow them to support each other. Just as we inhale and then exhale, the curvatures of the spine work together in complementing shape and motion.
Unfortunately the curvatures of our spine do not remain intact as we age. As we grow older all the curvatures of the spine tend to increase. The shoulders become rounded and stooped which is caused by an increase in the Thoracic curvature; the head is lifted to look forward, signifying an increase in Cervical curvature; and the abdomen bulges out, which indicates an increase in Lumbar (Pelvic) curvature. This change in the shape of the spine is due to:
- continued influence of gravity
- progressive decline in muscle strength and tone
- decreased used of some muscle groups
Asana practice using appropriate movements and breathing can prevent or offset this tendency of the spine to slump with aging. Therefore, in asanas we try to straighten both the lower and upper back, decreasing both of their curvatures. The aim is not to decrease the curvatures of the spine to less than normal but to prevent them from increasing to more than ideal.
Breathing
It might be surprising to learn that breath is the primary activator in spine maintenance. In the asana program I’m prescribing, it is one of the important reasons for the success in correcting spinal problems. The sequence of asanas that I have chosen are meant to work with deep breathing that will reduce the curvature of the upper back, and usually increase the curvature of the lower back and neck.
The Pranayama technique I am prescribing herein will send breath through the pelvis and diaphragm. Breathing fully throughout the whole spine will relax and soften the muscles which run parallel to the vertebral column and keep the spine upright. This part of the practice is very important so be sure not to leave it out as you learn the sequence. Take your time to coordinate the movement together with the breathing.
Asanas
1. Sukhasana
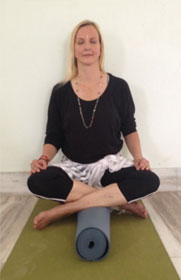 Props: 2 folded blankets, 1 rolled up mat and 1 belt.
Technique: Place strap around your rib-cage right below your chest. Start to inhale and exhale deeply against the strap. Count 5 for one deep inhale and 5 for complete exhale. Continue for 5 to 10 minutes.
Benefits: In order to sit well in pranayama with reasonable comfort, we need to create and maintain the normal curves of the spine because there is the least amount of strain on these curves when they are in their natural state. If any of these curves are out of alignment, it affects the entire spinal column. Tension from increased muscular activity interferes with our ability to work in comfort. A collapsed chest puts pressure on the diaphragm, limiting its ability to function and also hampers the expansion of the ribs. Sitting yourself higher on the blankets will keep the lumbar curve inward and the knees at the level of the hips which will help the lift the chest upward and shoulders back. Ankles placed over the rolled up mat will outwardly rotate the thigh which will help to create the natural lumbar curve.
2. Supta Baddha Konasana
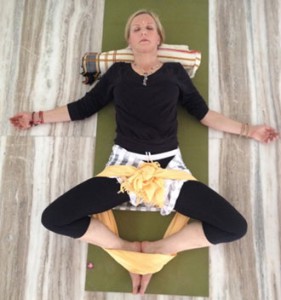
Props: 1 rolled up mat, 1 rolled up blanket, 1 belt
Technique:
Place the rolled up mat behind the lower back and lay down on your back on top of the mat. Place a rolled up blanket under the cervical spine and a belt around the outside the knees and in front of the pelvis and feet. Breathe deeply 5 to 10 minutes against the rolled up mat.
Benefits:
This technique provides 3 benefits:
- The mat behind the lower back will help to correct an over-rounded thoracic spine by opening the short and tight muscles at the front of the body.
- An increased thoracic curvature causes the head to migrate forward and creates chronic neck tension. A rolled up blanket under the neck will release that.
- The strap around the hips supports the lumbar region so the arch doesn’t become exaggerated.
3. Marjariasana (Cat and Cow Pelvic Tilt)

Props: none
Technique: Places hands and knees on the floor in a table position with a neutral spine. The hands are directly under your shoulders and knees under your hips.
- With an inhale, the tailbone and sitting bones lift. The crown of the head lifts and shoulders move back.
- With the exhale, the tailbone tucks under and navel moves towards the spine. The spine rounds and shoulders spread and chin drops to the chest.
Continue this movement for 5 to 10 minutes coordinating with the breath.
Benefits: The spine needs movement to lubricate the joints and provide nutrition to the spongy discs between the vertebrae. During Marjariasana the discs go through a process called imbibition where they soak up nutrients like a sponge after being squeezed. To feed and lubricate the discs properly, it is necessary to reverse the curvatures for brief periods of time which Marjariasana does beautifully.
4. Leg extensions

Props: none
Technique:
- Inhale, lift the right leg straight behind your right hip with toes pointing down. Stretch through heel, navel in.
- Exhale and bring your right knee to your chest, rounding your back in a cat stretch.
Benefits: The abdomen tends to bulge out because of weakened abdominal muscles. Leg extensions and crunches in table position will strengthen the transversus abdominis, which supports an exaggerated lumbar curve.
5. Opposite arm and leg:
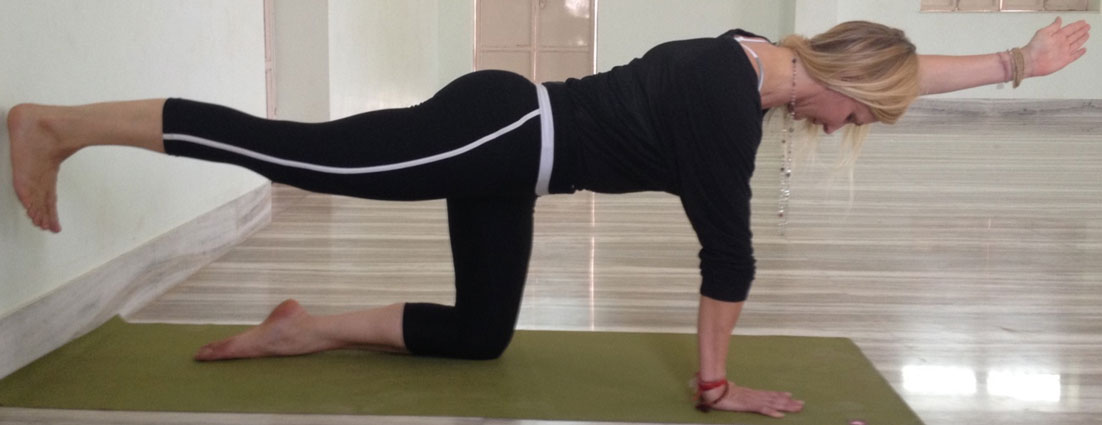
Props: none
Technique: Inhale right leg straight back from your hip and left arm in line with your left ear. Gaze down to keep your neck in line with the rest of the spine. Repeat on the left side.
Benefits: This pose and movement helps to strengthen a weakened abdominal wall and the entire back. It helps to flatten an exaggerated lumbar and thoracic curve.
6. Balasana
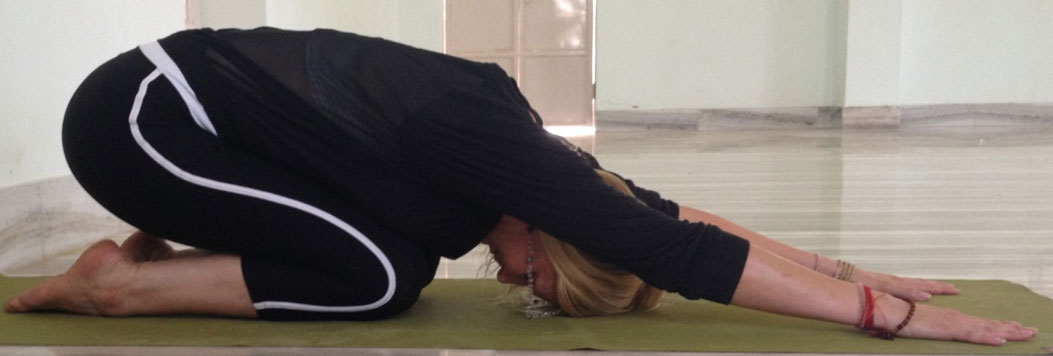
Props: none
Technique: Arms extended out in front of you and forehead to the floor. Keep your arms extended to create length into side ribs. Release the arms and let your hips drop toward your heels. Shoulders let go and forehead relaxes.
Benefits: This pose will lengthen the extensors of the spine, gluteus maximus and hamstrings. All these muscles were strengthened in a previous poses. Balasana will release the tension created in those muscle groups.
7. Arda salabhasana

Props: none
Techniques: Lay on your stomach. Arms out in front. Lift left arm and right leg equally. Lengthen through crown of the head and gaze down. Stretch arm away from the leg and breathe. Repeat on the other side.
Benefits: This is an efficient pose for strengthening the erector spinae – the large group of muscles that run parallel to the spine. When they are toned and strong, they hold us upright and when they are weak and over stretched, the spine slumps over into flexion.
8. Extended puppy pose to Parvatasana

Props: none
Technique:
- Curl the toes under and stretch the hands out in front.
- Move the sit bones halfway back to the heels and press down through the hands as you pull back through the hips and heels.
- Then lift the hips up towards the ceiling keeping your arms straight and knees bent into a bent knees Parvatasana and then your legs.
- Then straighten the legs for the full Parvatasana
Benefits: Stretches the entire back body and relieves lower back pain.
9. Navasana with strap
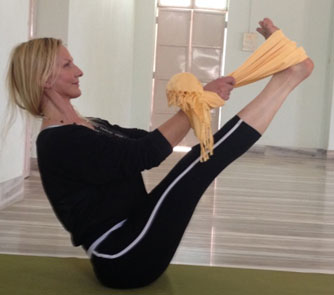 Props:Belt
Technique:
- Bend knees and place belt around both feet.
- Lean back and straighten your legs and take the support of a strap to hold your legs up.
- Straighten your spine, chest moves forward and up and shoulders move back. Breathe!
Benefits: This will strengthen the rectus abdominus. And as you exhale, the muscles contract and compress the soft organs of the torso, producing an “airbag” effect. This is thought to prevent hyperextension of the lumbar spine.
10.Dwi Pada Pitham
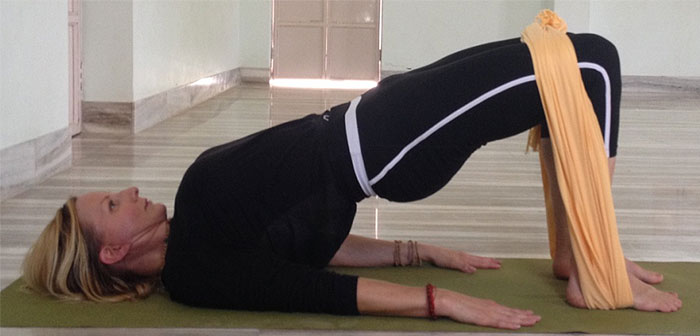
Props: Belt
Technique:
- Lie on your back. Bend knees and place your feet parallel to each other, hip-width apart right under your knees. Arms are by your sides, palms facing down.
- Inhale and press your feet into the floor and lift your hips. Lengthen your tailbone and extend from your pelvis out through your knees. One round of breath at the top.
- Exhale and come down one vertebrae at the time. One round of breath at the bottom.
Continue the movement with a synchronized breath for a cycle of 10.
Benefits: Dwi Pada Pitham is a dynamic movement that is coordinated with inhalation and exhalation. This simple yet versatile practice can be used in a variety of ways to release tension from the spine and breathing structures.
11.Apanasana
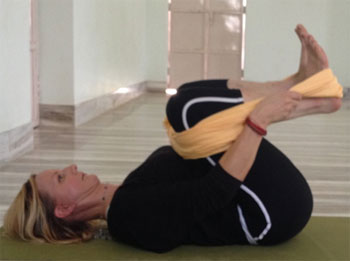 Props: Belt
Technique:
- Lie on your back. Bend your knees toward your chest and wrap the belt around your feet.
- Pull with your arms and push with your feet against the belt to keep your spine extended in two directions. This will help to keep the tailbone down.
Benefits: This pose stimulates the upward release of the diaphragm on the exhalation when the knees are drawn into the chest. Because so much lower back tension is the result of a tense diaphragm, apanasana is one of the simplest and most effective ways of helping the lower spine by creating more diaphragmatic “space” for the abdominal muscles to create postural support. Taken together, dwi pada pitham and apanasana constitute a powerful pair of counter posing movements that can dramatically reverse some of the most common health complaints. These last two asanas also prepares the spine for relaxation.
12. Savasana

The final posture is Dead Man’s Pose ““ relaxation. Every time you practice asana, you need to rest a bit at the end to let the muscles smooth out within the new energy you’ve created. Relax your breathing. Focus on your breathing and nothing else. Once your breath is deep and thorough you can walk yourself through a guided relaxation such as the one below.
Guided relaxation:
- Rest your awareness in the area of your hands, the palms, fingers, the wrists. As your hands relax feel them expand, notice how every tension evaporates, and disappear.
- Direct your attention to your feet. Relax the soles of each foot, the toes, the ankles.
- Bring your awareness to the rest of the legs as you relax your ankles, calves, knees, thighs, all the way up into the hips, pelvis and buttocks.
- Relax your abdomen and belly, and let your breathing be normal, free, unrestricted. Ride the breath and savor the air on both inhale and exhale.
- Now let the movement of your breathing relax your lower back, chest and heart. Let this whole area relax, expand and become tension free.
- Relax your neck, throat, face, and head. Soften every tension you come upon, letting your eyes fall backward away from the eyelids. Feel the energy on your face. Glow and feel the peace of stillness.
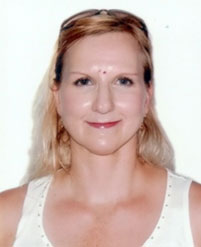 Sari Skinnider of Finland is a Yoga Therapist and teacher at Shri Jasnath Asan in Panchla Siddha, Nagaur, Rajasthan. Trained in physio therapy in the United States, she has been teaching and consulting for 9 years. She is a registered, international yoga instructor with American Yoga Alliance, and provides group and individual care and instruction at the ashram.
See all upcoming programs at www.shrijasnathasan.org/YogaTherapy or make an appointment by sending an email to info@shrijasnathasan.org
Yoga aspirants – Do you have a question for our veteran yoga teachers? Leave it here in the comments section, along with your state & country of residence and we’ll publish an answer.
Veteran yoga teachers – Want to write for Yoga Self Help? Download our publishing guidelines to learn how to contribute to the global yoga movement while improving your ability to communicate the values and journey of the yoga path. Publishing Guidelines
Leave A Comment